How to run Facebook ads for a small business, step by step
You do not need an agency or a big budget to run your first Facebook ads. You need a clear goal, working tracking and a simple setup. Here is the whole process.
Learning how to run Facebook ads for a small business is mostly about doing a few simple things in the right order. Meta’s ad tools look complicated, but a first campaign only needs a clear goal, tracking you can trust, a sensible audience, a handful of ads and a budget based on your own numbers.
This guide walks through each step in Ads Manager, the platform where Facebook and Instagram ads are built. Follow it once and you will have a campaign that can teach you something, even on a small budget.
Step 1: Decide what a result is worth
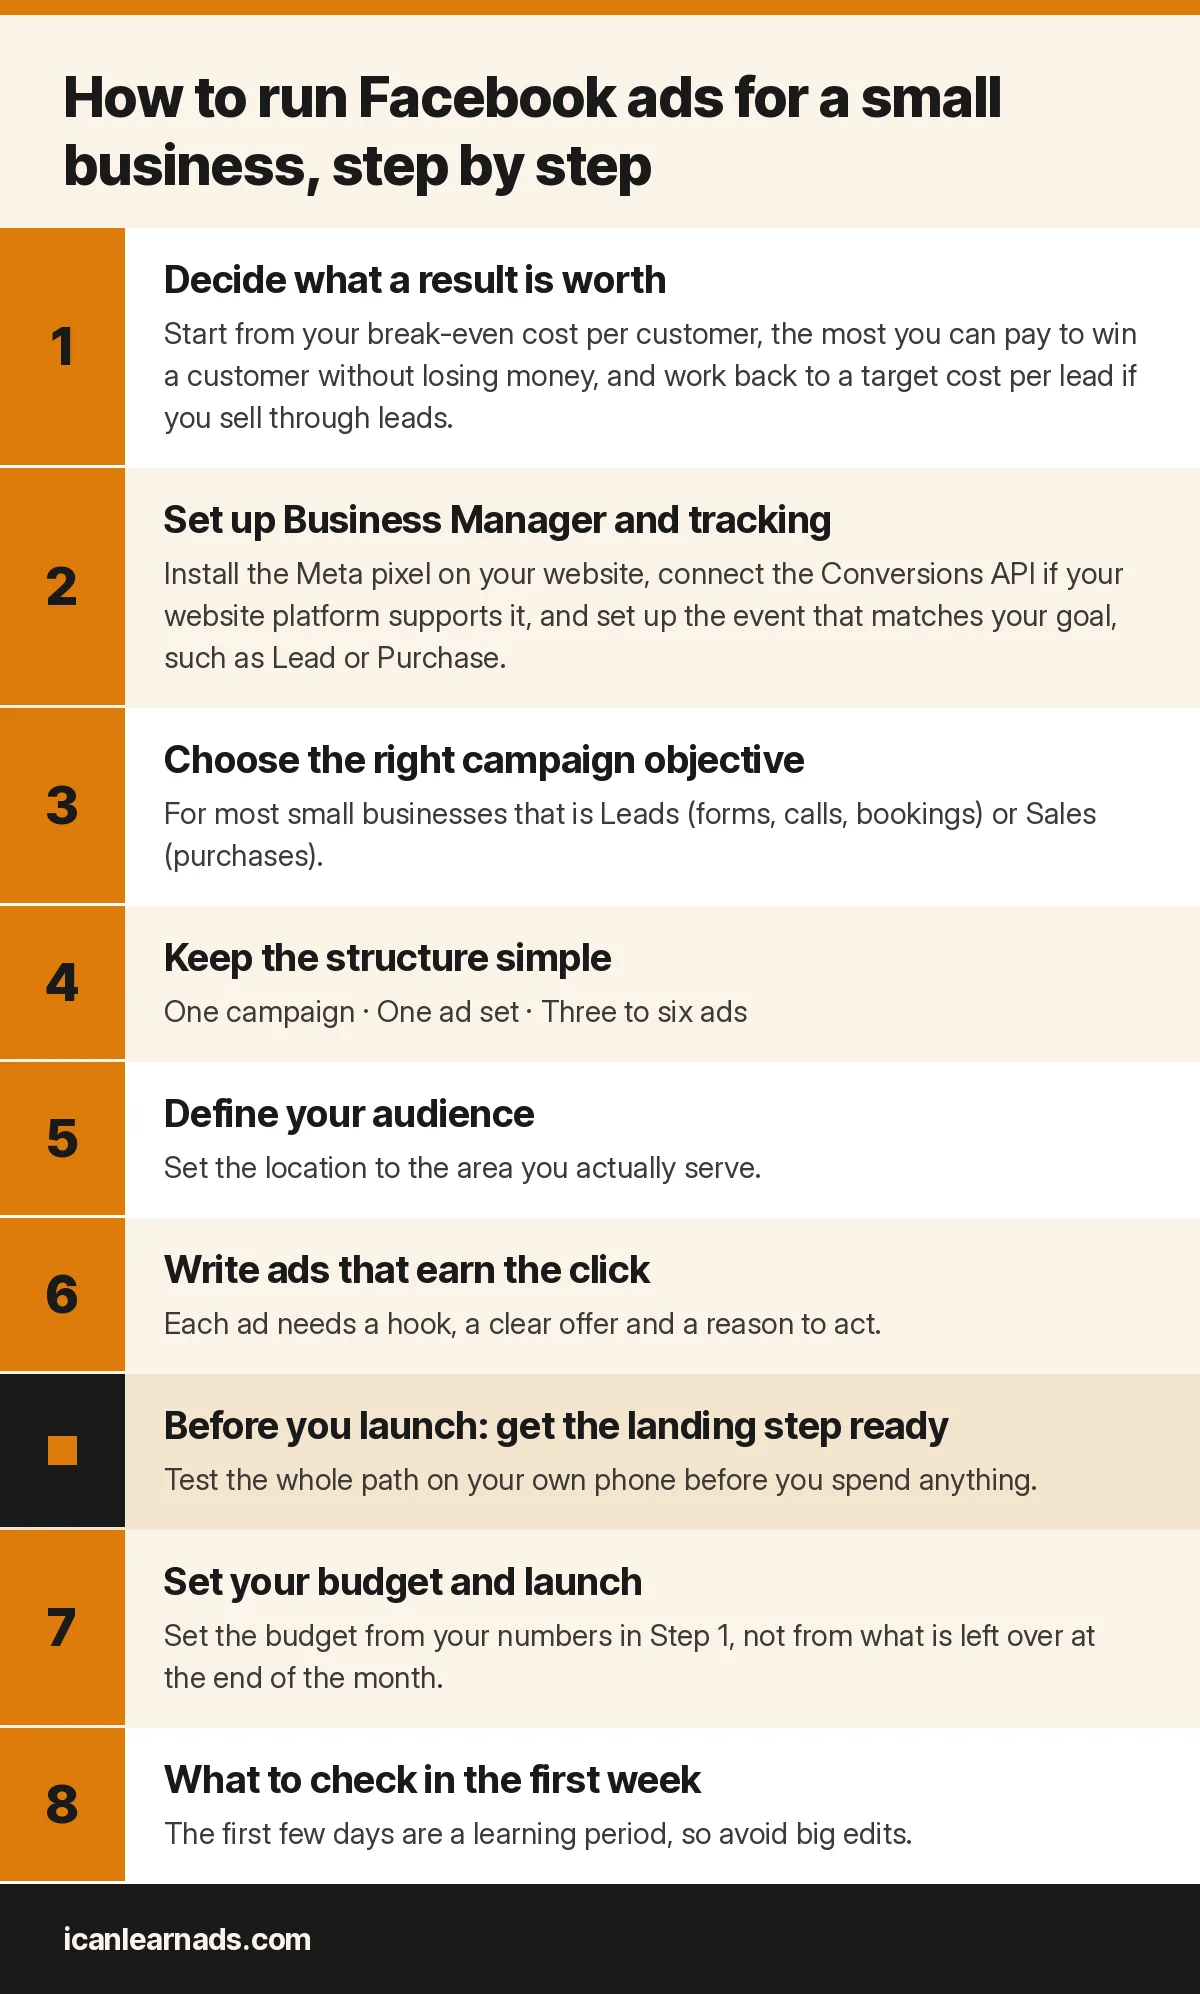
Before you open Ads Manager, decide what you want people to do: buy, book a call, request a quote or join your list. Then work out what that result is worth to you. Start from your break-even cost per customer, the most you can pay to win a customer without losing money, and work back to a target cost per lead if you sell through leads.
Without that number, every result is just a feeling. Our break-even cost per customer guide shows the two-minute calculation.
Step 2: Set up Business Manager and tracking
Run ads from a Meta business portfolio (Business Manager) rather than the Boost button on your page. It keeps your page, ad account, payment method and pixel in one place, and you stay the owner if you bring in help later.
Next, make sure Meta can see the result you chose. Install the Meta pixel on your website, connect the Conversions API if your website platform supports it, and set up the event that matches your goal, such as Lead or Purchase. Then test it: submit your own form or make a test purchase and confirm the event appears in Events Manager. Our plain-English tracking guide covers each piece.
Step 3: Choose the right campaign objective
In Ads Manager, click Create and pick the objective that matches the result you want. For most small businesses that is Leads (forms, calls, bookings) or Sales (purchases). Meta optimizes for the objective you choose, so an Engagement or Awareness campaign will find people who like and watch, not people who buy.
This is also the big difference between a real campaign and a boosted post. Our guide to boosting vs. real campaigns explains what you give up with the Boost button.
Step 4: Keep the structure simple
A small budget works best when it is not spread thin. For a first campaign, use:
- One campaign with the Leads or Sales objective.
- One ad set with your location, a broad age range and few or no interest filters.
- Three to six ads with different hooks, so Meta can find the strongest one.
Every extra ad set splits the budget and slows down how fast each one learns. You can add more once you have results to compare.
Step 5: Define your audience
Set the location to the area you actually serve. For a local business that may be a radius around your address; for an online business it may be one or more countries. Add an age range only if it is truly a requirement of your offer.
Meta’s delivery system is good at finding buyers inside a broad audience once it has conversion data, so you do not need to guess dozens of interests. Your ads do much of the targeting: a clear message about who the offer is for attracts the right people and filters out the wrong ones.
Step 6: Write ads that earn the click
Each ad needs a hook, a clear offer and a reason to act. Test different angles rather than small wording changes. For example, one ad might lead with the problem you solve, another with the result a customer gets, and another with how your process works.
- Open with the customer’s situation in the first line, in their words.
- Say plainly what you offer, who it is for and what happens next.
- Use a simple image or a short phone-shot video. Clear beats polished.
- Match the landing page or lead form to the promise in the ad.
- Pick one call-to-action button that fits the next step, such as Learn More, Book Now or Get Quote.
Before you launch: get the landing step ready
Decide where people go after they click. You can send them to a page on your website or use a Meta instant form, which opens inside Facebook or Instagram. Instant forms are quick to fill in, so they often bring more leads, while a website page gives people more information and can bring fewer but more committed leads. Either can work; the key is that the next step is obvious.
- Repeat the ad’s main promise at the top of the page or form.
- Ask only for the details you truly need to follow up.
- Show clearly what happens after someone submits, such as a call within one business day.
- Test the whole path on your own phone before you spend anything.
Step 7: Set your budget and launch
Set the budget from your numbers in Step 1, not from what is left over at the end of the month. A useful guide is whether the budget can buy enough results for Meta to learn, while still being an amount you can comfortably test for a couple of weeks. Our Facebook ads budget guide for beginners works through the math.
Choose a daily budget for an ongoing campaign, review every setting once, and publish. Meta reviews new ads before they run, which usually happens quickly.
Step 8: What to check in the first week
The first few days are a learning period, so avoid big edits. Check in once a day for problems, not for verdicts:
- Is the ad spending, and are results being tracked?
- Are people clicking? A very low click-through rate points to the ad, not the audience.
- Are clicks turning into results? If not, look at the landing page or form.
- Are new leads getting a fast reply? Slow follow-up makes good ads look bad.
After about a week, compare your cost per result with your target. If results are weak, work out which step is breaking before you change anything. The metric ladder helps you find it, and the learning phase guide explains what to expect while Meta settles in.
Common beginner mistakes
- Boosting posts instead of building a campaign with a Leads or Sales objective.
- Launching before testing that the pixel records the result.
- Splitting a small budget across many audiences.
- Judging the campaign after one day and switching it off.
- Letting leads wait hours or days for a reply.
Your launch checklist
- Goal and break-even cost written down.
- Business portfolio, ad account and payment method set up in your name.
- Pixel and conversion event tested in Events Manager.
- One campaign, one ad set, three to six ads.
- Budget set from your numbers, with a test length of at least a couple of weeks.
- A follow-up plan for every new lead.
Learn it step by step, or get help
Running your own Facebook ads is a skill you can learn. For the full system, start with the free I Can Learn Ads training. If you would like one-on-one help on your own account, book a call with our team.
Leads are only half the job; the other half is what happens after the form. Spencer Digital’s guide to CRM pipeline stages for high-ticket sales shows how to track every lead to a sale. And when you would rather hand campaigns and follow-up systems to specialists, Spencer Digital’s paid media and marketing operations services can take them off your plate for a flat monthly rate.
Want the whole system?
The free training walks through every step in five short lessons, with the Ad-Ready Playbook.
Start the free training